A wooden gazebo is more than just an outdoor structure, it’s a space for relaxation, gatherings, and adding charm to your yard. With Seattle’s unpredictable weather, having a covered area makes a world of difference, letting you enjoy your outdoor space year-round. Whether you’re sipping coffee on a misty morning or hosting a summer barbecue, a well-built gazebo can elevate your backyard experience.
Planning and Preparation
First, find the perfect spot in your yard. You’ll want a level area that won’t flood with heavy rain. Consider proximity to trees, they provide shade but can also drop leaves and debris.
If your gazebo will house a fire pit or outdoor heater, position it away from overhanging branches for safety. Also, think about whether you want it connected to a deck or patio for easier access.
Before building, check King Counties permit requirements. Gazebos often require approval from the city or King County, depending on its size and placement. Structures over 200 square feet usually need a permit, and local building codes may dictate setback distances from property lines. We have Franky’s Excavation help us out on dirt work for setting up the foundation of our gazebos. Last thing anyone wants is to have to deal with building codes. Trust me. So in best practice, just make sure you’re allowed to before you just do it. Never know who will report, then your sweet home is suddenly much more hostile.
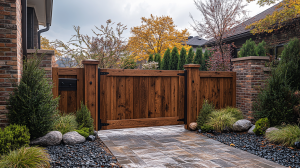
Seattle’s climate demands weather-resistant wood. Cedar, redwood, and pressure-treated lumber hold up well against moisture and mold. Cedar is a top choice because it naturally resists rot and insects, while redwood offers durability and a striking appearance, I love redwood and it loves me. Avoid untreated softwoods unless you love replacing boards every few years.
Designing Your Gazebo
Gazebos come in all shapes and sizes.
Octagonal, rectangular, open-sided, or fully enclosed, your choice depends on personal style and function. Since Seattle sees plenty of rain, consider a steep roof pitch (at least 30 degrees) to help water run off and keep puddles from forming. Adding gutters and down spouts can also help redirect rainwater away from the foundation. Could you imagine sitting inside your gazebo, dry, listening to the patter of rain dance off the roof onto your French drain, reading your favorite book with a nice cup of chamomile tea?
I am.
For flooring, pressure-treated wood or composite decking works best to withstand Seattle’s damp conditions. Composite materials offer long-term durability and are resistant to rot, though they can be pricier than traditional wood.
Gathering Materials and Tools
- Lumber – Cedar, redwood, or pressure-treated wood for structural support and decking.
- Concrete footings – Essential for stability, especially in wet conditions.
- Roofing material – Asphalt shingles, metal, or polycarbonate panels work well in Seattle’s climate.
- Fasteners and hardware – Galvanized screws, bolts, and brackets to prevent rust.
- Sealants and stains – To protect against moisture and UV exposure.
- Essential tools – A drill, circular saw, level, post-hole digger, tape measure, and carpenter’s square.
Thanks to the pandemic a few years ago, it’s important to check with lumber costs. As much as I love redwood, its cost has significantly increased. Lumber became very short in stock with everyone stuck at home with nothing to do, most turned to crafting. I can’t blame them it’s soothing, just the prices aren’t the same.
Building the Foundation
Start by prepping the ground, remove debris, level the area, and mark the gazebo’s dimensions.
Then, dig post holes at least 18 inches deep and pour concrete footings to anchor the structure securely. Since Washington’s soil retains moisture, proper drainage around the base is important to prevent shifting over time.
Constructing the Floor
Once the posts are set, it’s time to lay floor joists and decking boards.
Use pressure-treated lumber for longevity, and space boards slightly apart to allow for natural expansion. A water-resistant sealant adds an extra layer of protection against moisture and mold.
Erecting the Frame
Assembling the walls is where things start looking like a gazebo. Secure the support beams and raise the sections, ensuring corner braces add stability.
If you want a decorative touch, now’s the time to think about railings, lattice panels, or custom trim.
Building the Roof
A solid roof is important in Washington. Whether you go with asphalt shingles, corrugated metal, or polycarbonate panels, install sheathing first to create a sturdy base.
Consider adding roof vents for better airflow, especially if your gazebo will have an enclosed design. Gutters or drainage channels will help keep rain from pooling around the structure.
Finishing Touches
With the structure complete, add railings, steps (if necessary), and apply a weather-resistant stain or paint to protect against Seattle’s moisture-heavy air. If your gazebo includes built-in seating or lighting, now’s the time to install those features.
Maintaining Your Gazebo
Seattle’s damp climate means routine maintenance is a must. Every few months, inspect for moisture damage, loose fasteners, and mildew growth. Clean the surface with mild detergent, and reapply sealant every 1-2 years to prolong the life of the wood. If moss starts forming, a gentle scrub with a vinegar solution can help keep it at bay.
Enjoying Your New Gazebo
Once built, your gazebo is a year-round retreat, a cozy space to enjoy Seattle’s unique charm no matter the season. Whether it’s a peaceful morning with a book or an evening gathering with friends, this backyard addition will quickly become a favorite spot.